
How to Calibrate Your Computer Screen with the Spyder5

We spend so much time taking our photos, yet there is one crucial step in the process from camera to print that many photographers miss out. Calibrating your screen is an essential task, and if you’ve never done so then I would be surprised if you told me you’d never had concerns about how your photos look. Whether it’s printing them or showing them off online, if you’ve been processing your images with an uncalibrated screen, then it’s likely other people are seeing them very differently to you. Without calibration, you cannot process your photos properly and the true look to an image could be very different to how you see it on your screen.
You definitely shouldn’t expect your screen to be calibrated by default, and in fact the changes that are made through proper calibration can be quite drastic. I’ve heard a rumour that Apple Macs come with perfectly calibrated screens – this isn’t true either. Any screen’s calibration will change overtime, so calibrating it is something that should be repeated regularly.
You may have fiddled around with your screen’s contrast, hue and saturation modes, trying your best to calibrate the screen by eye. There are even some (incorrect) articles online that advise you on how to calibrate without a device, but you may as well try and do it blindfolded. Instead, you need to get yourself a dedicated calibration device. They sit on your computer screen, flicking through a set of colours and adjusting the settings so they match to the ‘true’ colour readings the device has onboard. This is the only way to correctly calibrate a monitor.
Choosing a Calibration Device
 There are a couple of options for you if you’re looking for proper screen calibration. The most popular, and easiest to use, option is the Spyder series by Datacolor. The Spyder 5 is the latest offering from Datacolor, and is where you should put your money for proper results. After all, why spend so much time taking images if they’re going to be ruined during processing?
The Spyder5 comes in 3 options: EXPRESS, PRO and ELITE. The Spyder5EXPRESS is your cheapest option, but it comes with fewer calibration options. The Spyder5ELITE has plenty of advanced calibration tools, although this is potentially beyond the average photographer’s needs.
Personally, I use the Spyder5PRO. It comes with the added advantage of a sensor that records the ambient light in the room, taking that into account when calibrating your screen.
Another option for you is the X-Rite ColorMunki, which is a little cheaper than the offerings from Datacolor. However, they are not the favourite amongst the photography community – something that is perhaps telling of their success rates and ease of use. If you want my personal opinion (although I admit I have not used X-Rite’s device myself), I would suggest that you go for the Spyder series.
Calibrating Your Screen with the Spyder5
Once your shiny new Spyder device has arrived, it’s time to get calibrating. Be prepared for a shock – if you’ve never done this before, then chances are you’ll see a drastic colour change. The Spyder is supplied with Datacolor’s calibration software, which you should install onto your computer. The software is super easy to use. There is a great wizard that takes you through the entire process. The first screen gives you a checklist to run through, making sure you are ready to calibrate your screen.

Make sure you run through this checklist. Letting your screen warm up is important, as the appearance of colours may change intially. Any desk lamps or other spotlights should be switched off before you calibrate too, as they can alter the results. Then just reset your monitor as the wizard instructs, and plug the Spyder device in. You’re ready to go!
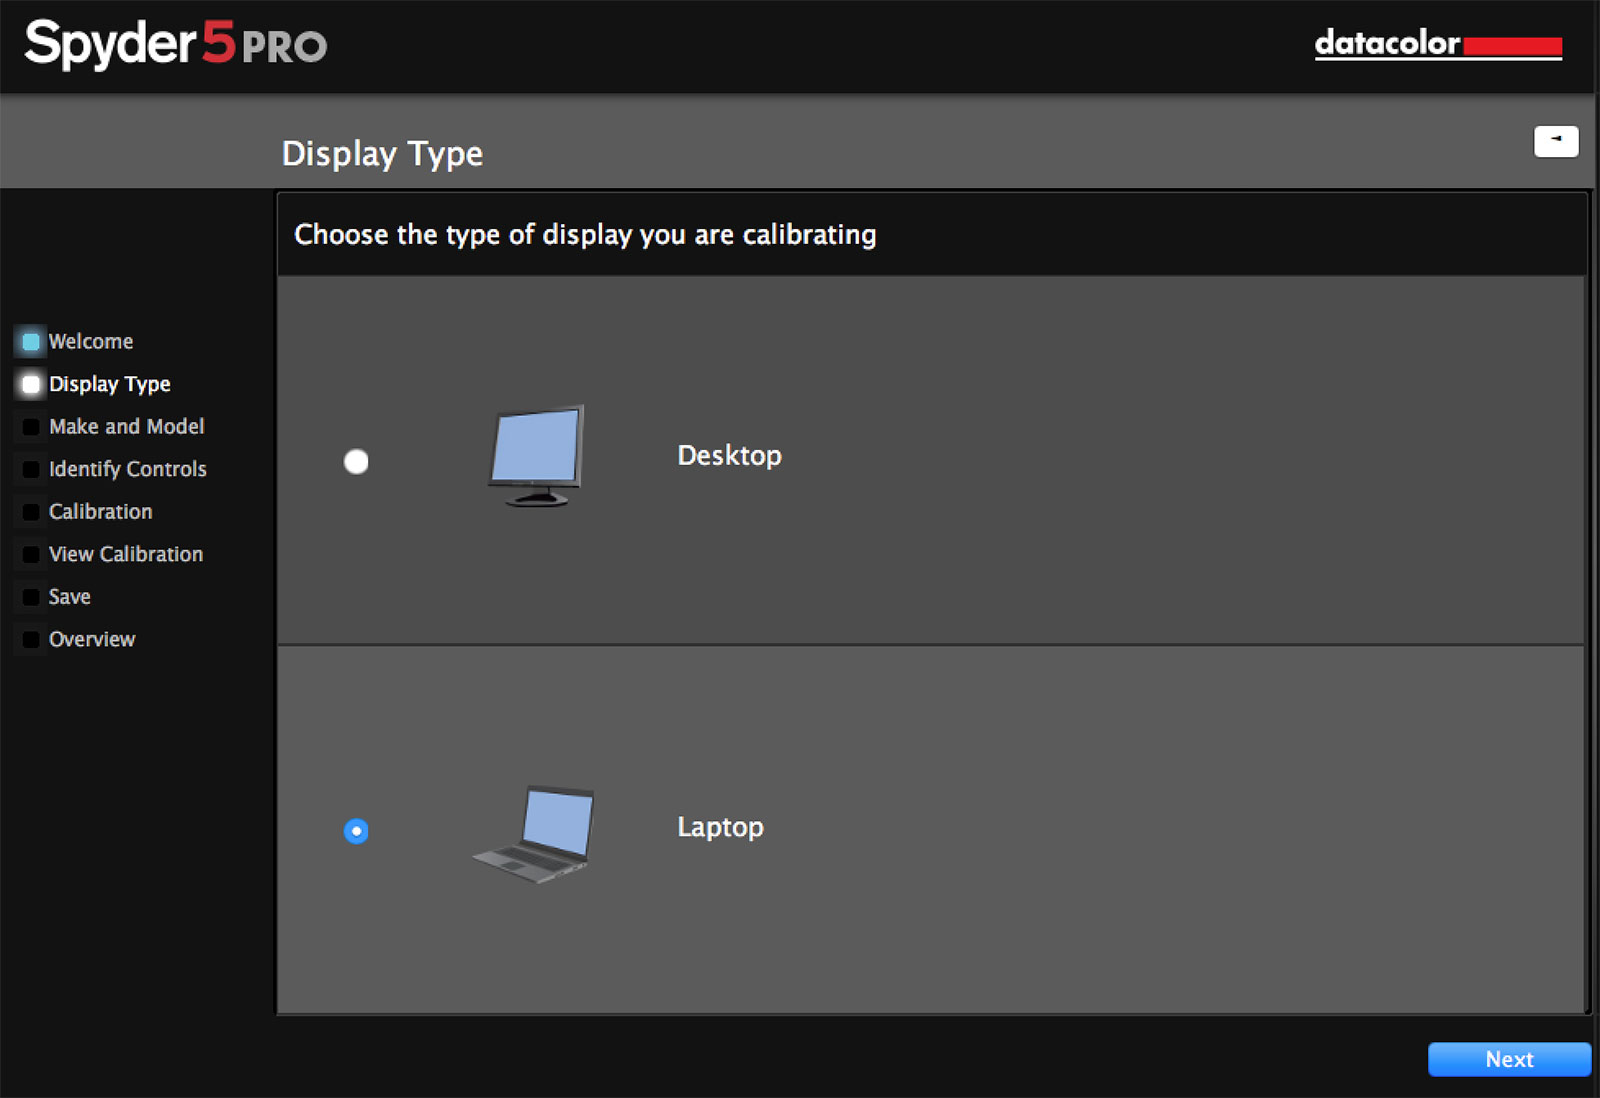
Step 1: Choose Your Display
This is simple. Just choose whether you’re using a desktop or laptop computer screen, and then enter the make and model on the following screen.
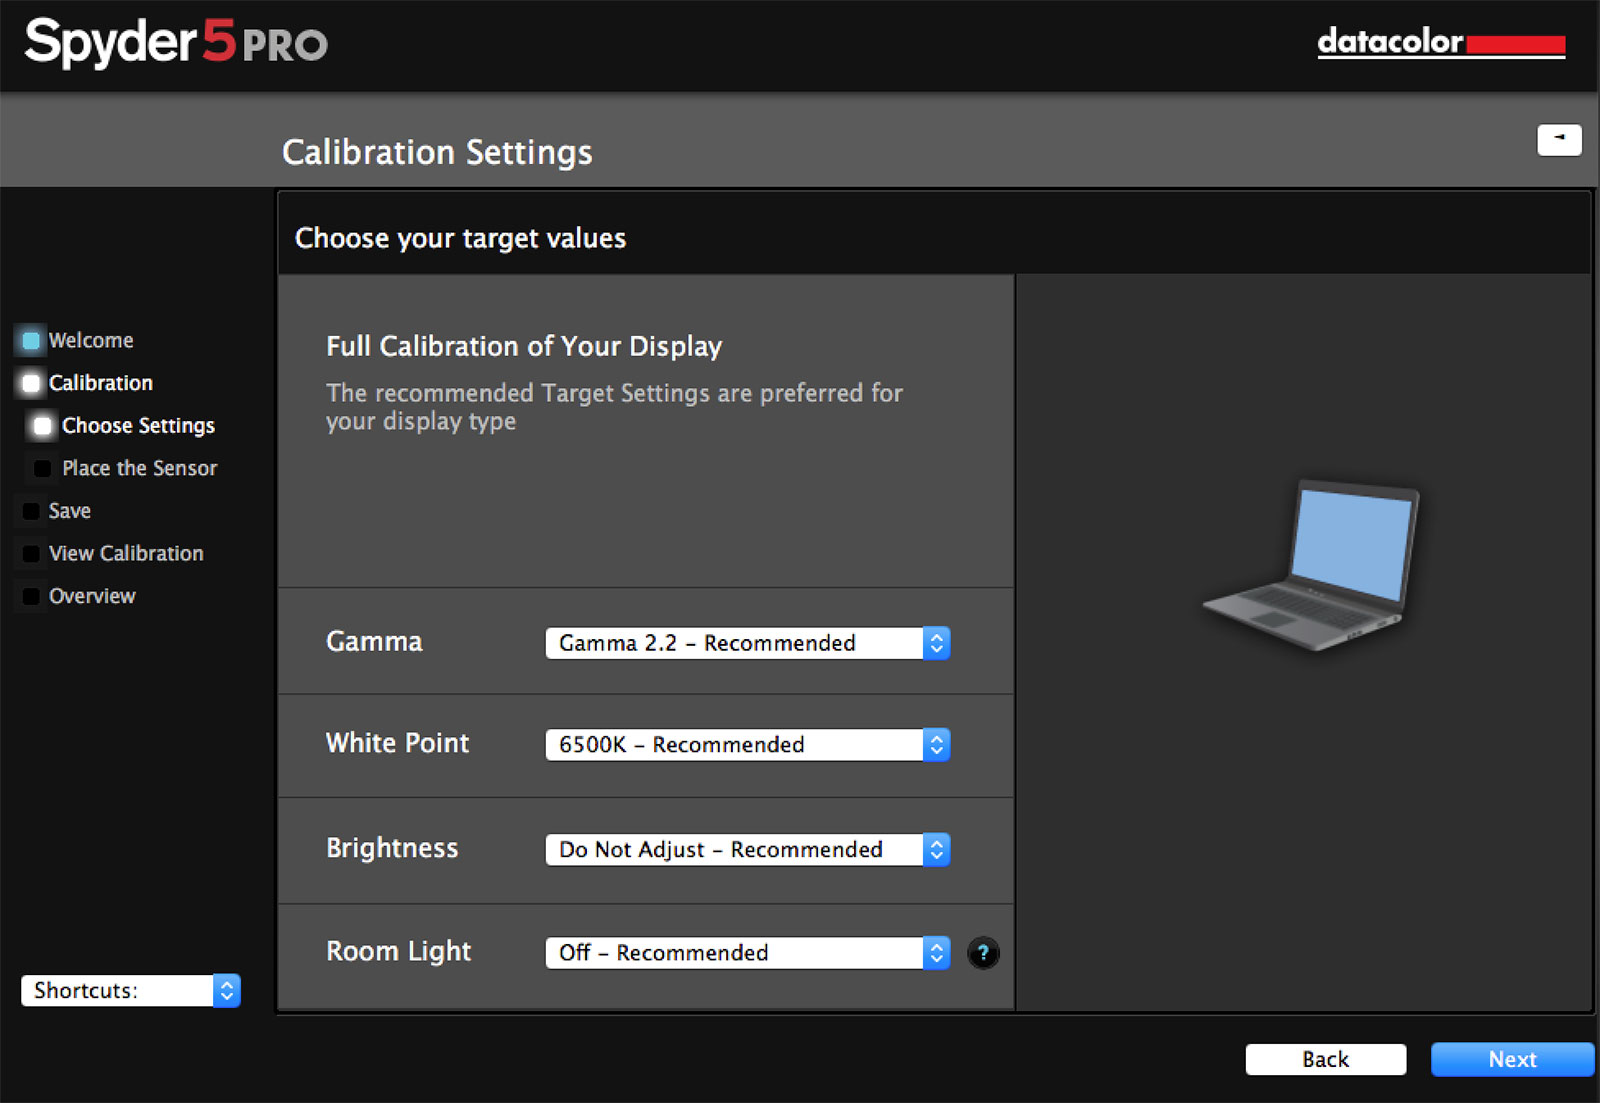
Step 2: Choose Your Calibration Settings
Now it’s time to start a calibration. Choose ‘Full Calibration’ and then adjust the four settings you are offered, if needed. The ‘recommended’ settings you can see in the following screenshot are based on my previous calibration choices, but it is actually recommended that you allow the software to adjust the brightness and room light compensation (if you are using the PRO or ELITE) as well.
The tooltips to the right of the screen will help you out here if you’re having difficulty, but sticking to Gamma 2.2 and a white balance of 6500K will suffice for almost all users.
Step 3: Place the Sensor
Next you’ll see a screen with the outline of your spyder device. This allows you to line it up properly, so just position the device as instructed by the software, and then you’re ready to roll. You may need to tilt your screen backwards a little so the Spyder5 can sit properly.

Step 4: Start the Calibration
Once you’ve started the calibration, you cannot switch windows on your computer. Remember, the device needs to see the colour on your screen, so just leave it be and relax for a moment.
Throughout the process, the software will swap through a variety of different colours and shades. Keep an eye on it, as you may be instructed to adjust the brightness or contrast manually, for example (particularly for desktop screens that have manual controls).
Step 5: Review the Results
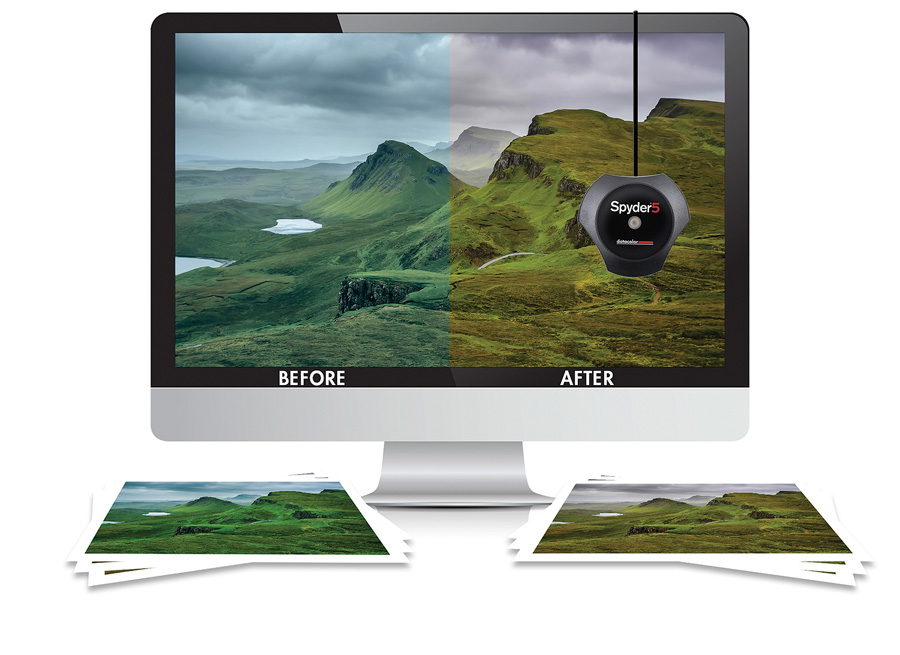
Once complete, you’ll probably notice that your screen looks more ‘red’ than usual. This is normal, and what you previously saw as white was actually more blue, and now you’re looking at a true white so it appears to have a red hue. But your eyes will adjust, and you’ll soon get used to it. Trust the calibrator!
Make sure to save the new colour profile, and then check out the results. There’s a cool ‘before and after’ screen where you can switch to see the actual difference your calibration device made. You will probably agree, afterwards, that it is worth every penny.

Conclusion
Calibration devices have come down in price overtime, and you can pick up the Spyder5EXPRESS for £88 ($130 USD). The PRO and ELITE options are a little more expensive, but you are getting a device that you will use over and over again to ensure your photos look their best.
Calibration is essential. Without it, you can’t process your photos correctly. An uncalibrated monitor will mean that you are processing an image one way, only to find that the ‘actual’ result looks different. You may find that you lose detail in blacks or highlights as a result, even though it may appear correct to you, or add overly warm or cold tones to an image.


