Lightroom Colour Correction: Hue, Saturation, and Luminance

Chances are that you’ve played with the saturation or vibrance tools for colour correction in Lightroom. They are fine for the majority of situations, but they adjust the colour across all ranges in your photo. You’re faced with a problem if you want to boost the green areas of your photo, but not parts of another colour. This is where the ‘Color’ tool in Lightroom comes in handy, allowing you to isolate your adjustments to specific colours.
If you’re just trying to warm up your image because it looks too blue, then these kind of individual adjustments are not the best way to do it. The same goes for cooling an image down that is too hot (meaning it has a strong red or orange hue). For this type of adjustment, you’ll want to try and fix it by playing with the white balance slider first.


When you want to make more fine-tuned adjustments to the colours within your photograph, Lightroom has just the tool you need. The tool doesn’t have a fancy name (making it difficult to choose a catchy title for this tutorial), but can be found in the Develop window of Lightroom. It’s simply labelled ‘Color’ – although it sits in the same panel window as two other adjustments which you can switch between: ‘HSL / Color / B & W’.

Using Lightroom’s ‘Color’ Adjustments Tool
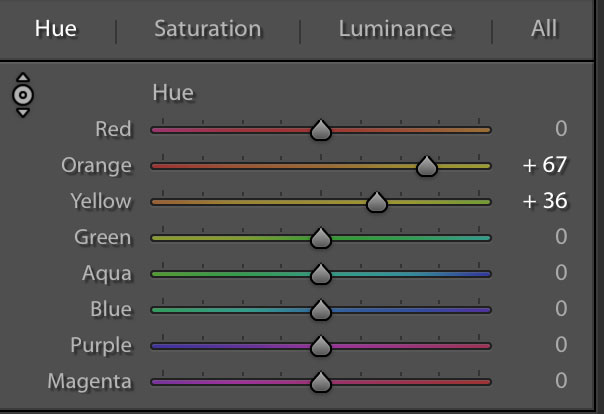
For these fine-tuned colour corrections, you’ll want to use either the HSL or Color window. They both do the same thing, but are laid out differently. HSL stands for ‘Hue, Saturation, Luminance’. You’ll use this window if you want to adjust the saturation (or hue / luminance) of lots of different colours at once. Using the Color window allows you to adjust the hue, saturation, and luminance at the same time of a specific colour. For the purpose of this tutorial, I’ll be using the Color panel.

How to Use Hue, Saturation, and Luminance
When it comes to colour correcting your photos, these are the three main sliders you’re going to be playing with. You will probably find that you focus only on the saturation slider, but it’s a good idea to know what the three of them do.
Hue
The hue slider adjusts the tonal range of a colour. It let’s you replace a colour with a different hue (tone) that is its neighbour on the colour wheel. Take a look at this wheel:

If you adjust the hue of the green colour in your image, you’ll be able to introduce yellow tones by sliding to the left (towards -100 value), or a teal tones by sliding to the right (towards +100 value). Here’s an example:

Obviously, when used at the extremes the colours can look slightly weird. The example on the right shows the crows fighting in a rather sickly looking grassland. However, more subtle adjustments of the hue can be appropriate at times, especially when unique lighting conditions have caused colours to appear ‘incorrectly’ in the final image.
Saturation
This refers to the ‘strength’ of a colour. Using the general saturation slider, available in Lightroom’s basic adjustment window, will often have too big an effect on your image. It’s quite a sensitive slider and going just a little too far can make your photo seem over-processed. A positive value on the saturation slider increases the strength, and a negative value decreases it.
You might find that a particular colour is too overwhelming, or underwhelming, in your photo and you want to rectify it. Selecting the colour in question and adjusting for it allows you to do just that, without the blanket saturation adjustments that you would’ve made in the ‘basic’ panel.

Here I have removed the strong red tones on the fish as they were quite distracting in the photo. By choosing the red tones only, this was quick and easy to do, pulling the saturation slider to the left to a value of -82.
This is also how people achieve images where only one colour is present, with the rest of the image in black and white. It’s done by pulling the saturation down low for every colour, except for the target.
Luminance
The luminance of a colour describes its brightness. This can be a bit of a weird one to adjust, and I don’t think I’ve ever found myself actually using it for my editing process. Sometimes it can be worth experimenting though to see what it can achieve for your own images.
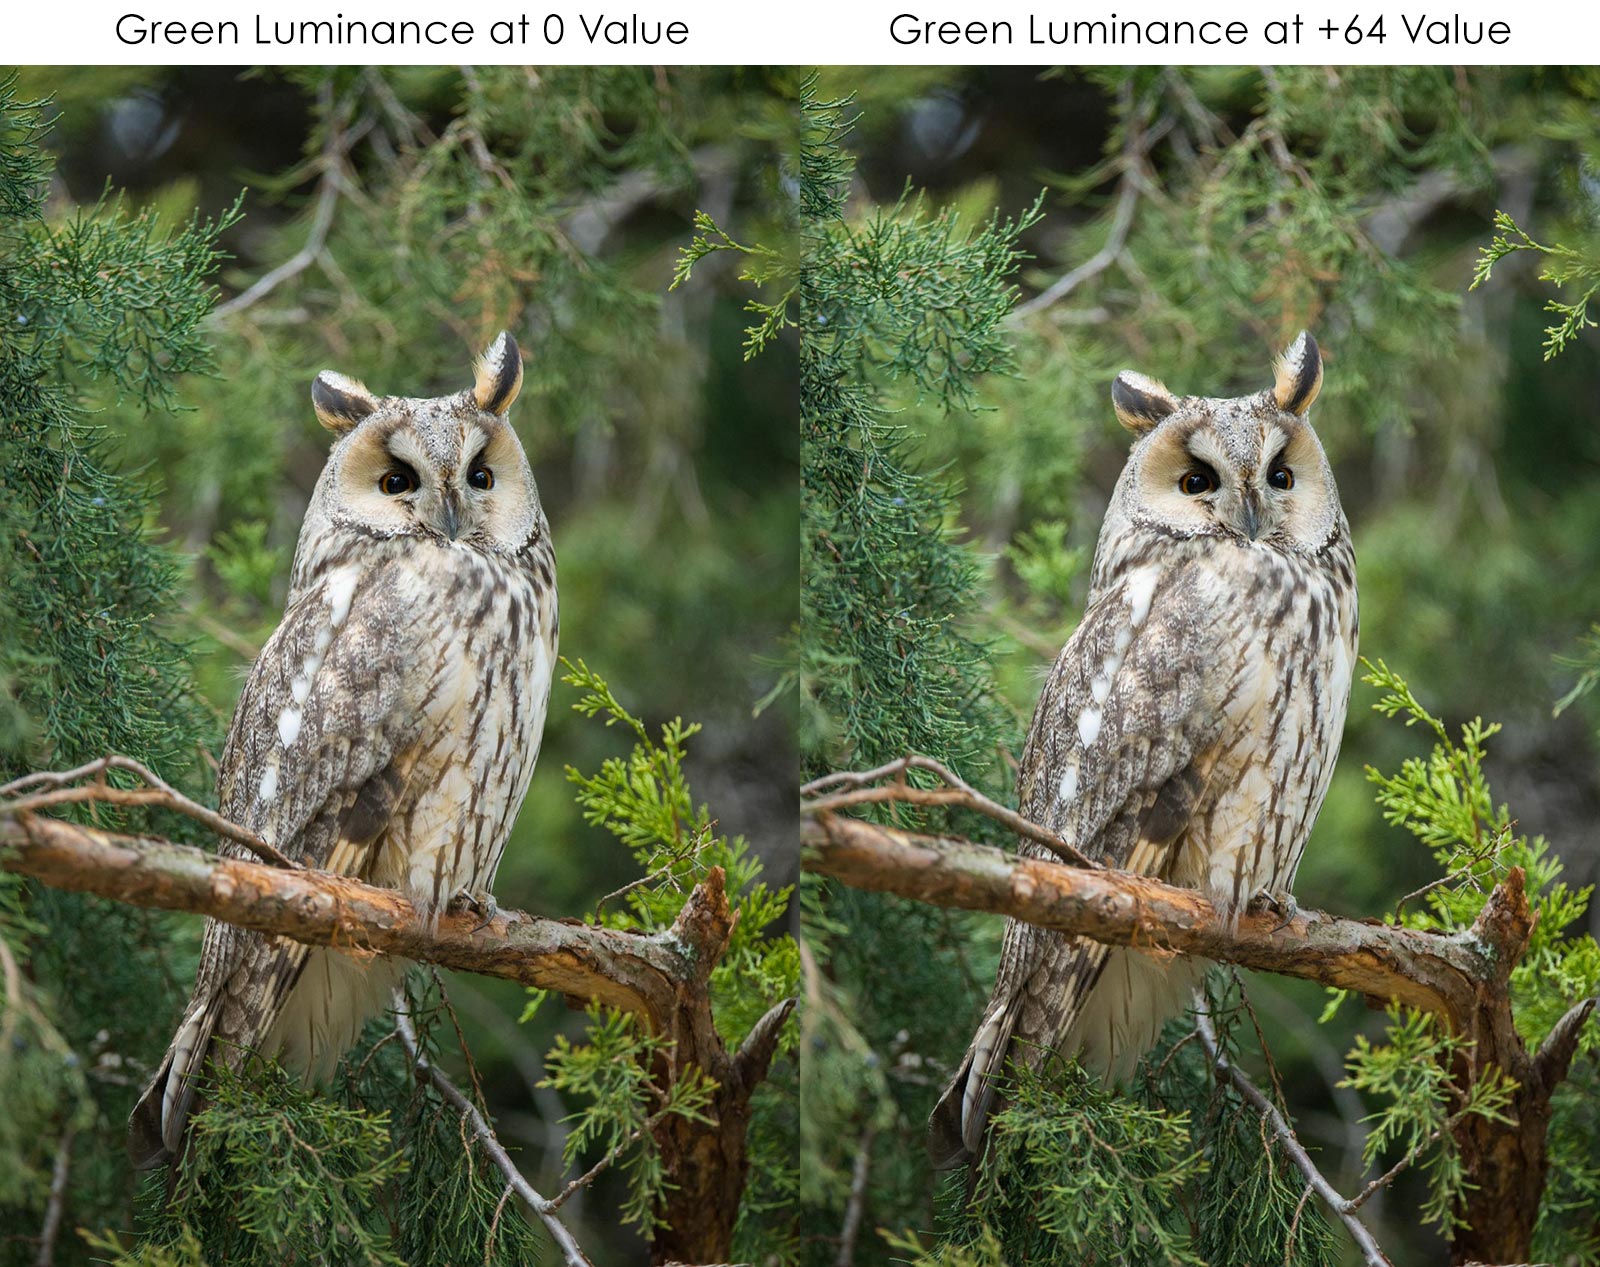
You can see that pulling the luminance slider to the right brightened the greens in the background. It’s a nice way to selectively brighten an image in only certain parts, when done properly.
How to Do REALLY Specific Colour Selection
You’ve probably already realised that the preset colours you can select to adjust from are limited. There are plenty of different colours that could all fall under ‘Red’, for example. Luckily, Lightroom has a tool for this which allows for targeted adjustment.
Switching to the HSL window, there’s a little tool that let’s you select any colour you wish by clicking directly on your image. It’s circled in red here:

To use this tool, select whether you want to adjust the hue, saturation or luminance with the sub-menus available. Then, click the colour in your image you want to change. You need to click and drag upwards (for a positive value), or downwards (for a negative value).
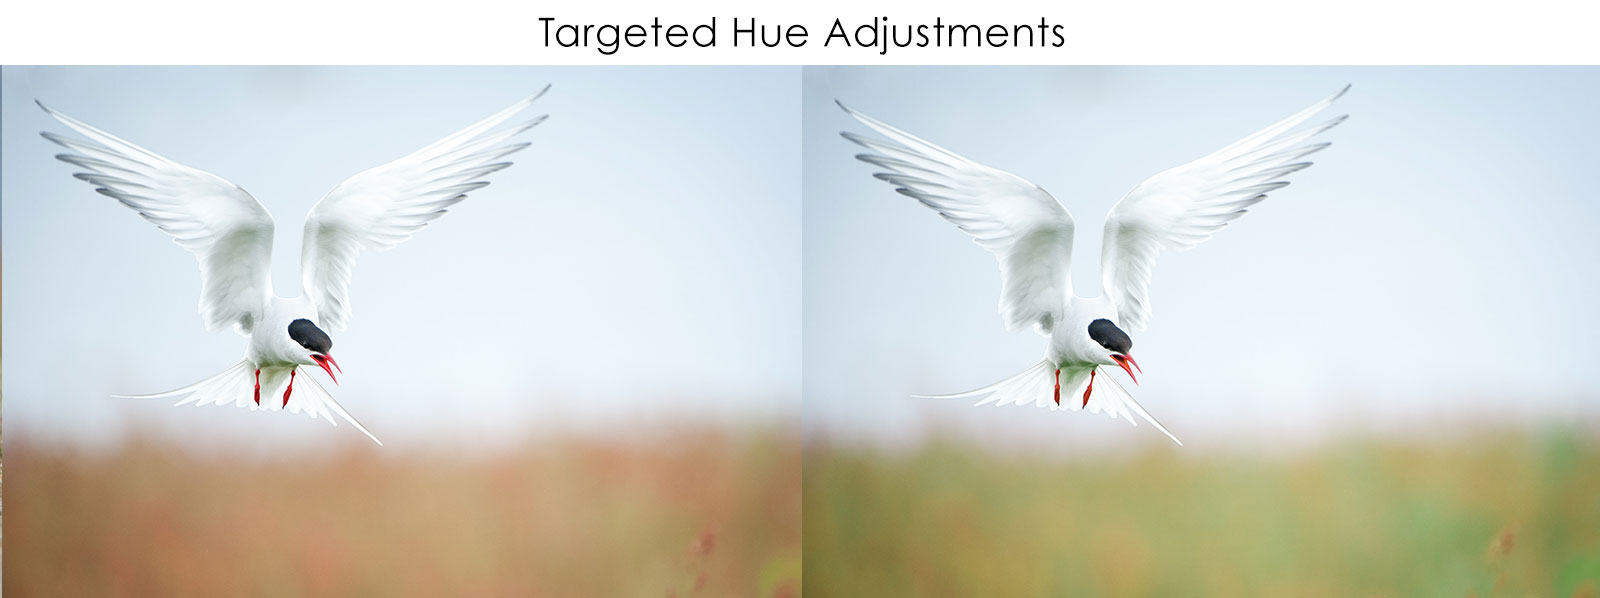
Take this photo for example. If I wanted to adjust the brown grasses and make them more green, I can change the hue of the background tones precisely. Clicking on the brown area, I hold and drag upwards to change the hue. It causes an adjustment to multiple colour sliders at once, targeting exactly the colour tone you selected.