
How to Rescue Over and Underexposed Photos
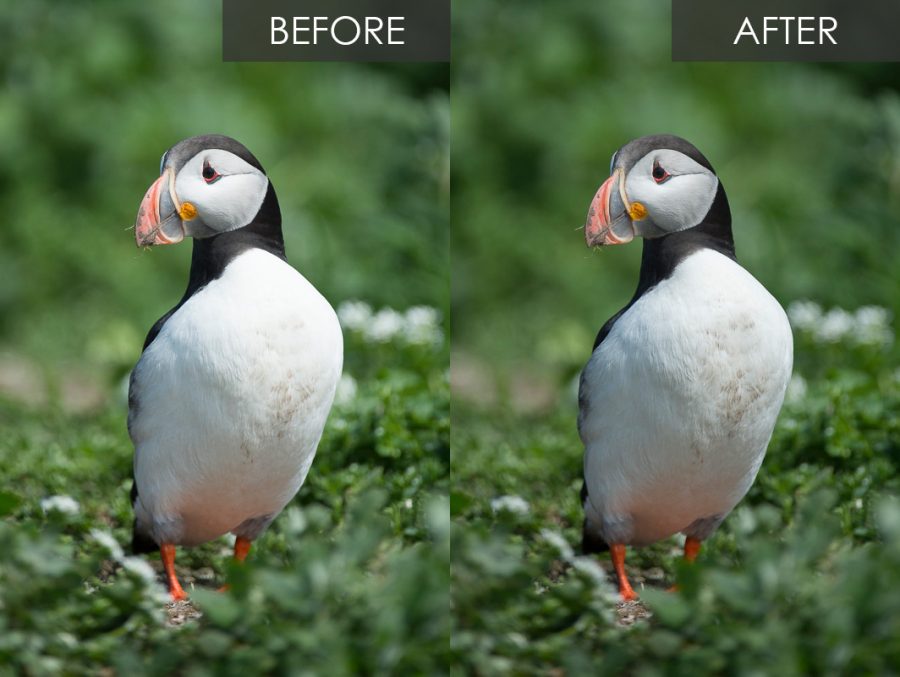
It’s not easy to get your exposure perfect all of the time, especially if the scene contains contrasting colours. For example, a scene with both light and dark areas can be hard to expose without losing any details in the highlights or shadows. The difference between these areas is known as the dynamic range, and some cameras are better than others at recording information throughout it.
If your camera fails to record the information, then the detail in the highlights or shadows will be lost and it cannot be recovered; the areas will appear solid white or black. However, most of the time you’ll probably find yourself in luck and some detail has been captured. Recovering this is fairly simple, and that’s where the Shadows & Highlights sliders of your editing software come to the rescue.


What Do They Do
The highlights slider will recover overexposed areas by adjusting parts of the image that appear very white (these are known as the highlights). It then attempts to recover the detail lost.
The shadows slider will do exactly the opposite. It works to brighten and bring detail back to underexposed parts (shadows) of the image.
Finding the Sliders
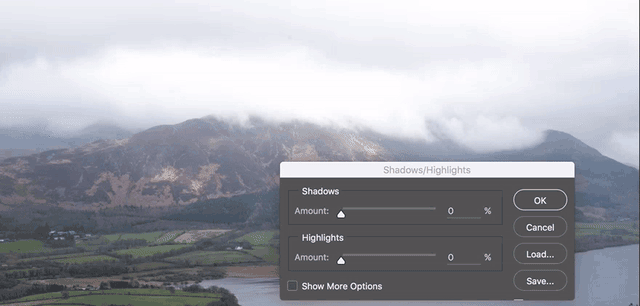
The sliders are present in both Adobe Lightroom and Photoshop. In Photoshop, when you open a raw file you’ll be faced with Adobe Camera Raw – it’ll let you make your initial raw adjustments before opening the file fully in Photoshop. You’ll see the separate ‘Highlights’ and ‘Shadows’ sliders there. If you don’t have a raw file, you can find the sliders under ‘Image > Adjustments > Shadows/Highlights…’. However, if you aren’t shooting in raw then you’ve already thrown away most of the information you need to recover the lost details.
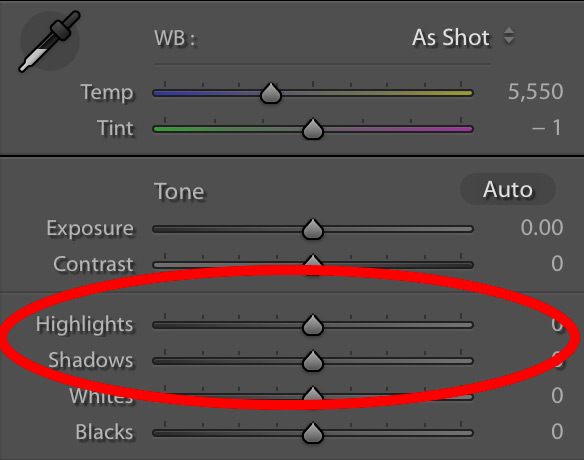
In Lightroom, take your photo to the ‘Develop’ window and you’ll see the sliders under the ‘Basic’ section of the side panel as shown in the image below.
Making the Adjustment
Once you’ve found the sliders, it’s really just as simple as sliding them along until you’ve recovered the details.
Keep in mind, though, that the sliders can make a photo look artifical if you go too far. You don’t want to overdo it, and sometimes you just can’t bring the details back anyway. A good way to see if there is any detail left in those areas is to pull the exposure slide all the way to the left (or to the right if you’re recovering dark areas). If the over or underexposed areas remain white or black respectively, then the details are lost forever and there is nothing you can do.
Further Reading: “All You Need to Know to Process a Raw File in Lightroom“


