
6 Secrets of Photoshop’s Cropping Tool
The cropping tool in Adobe Photoshop does more than just trim your photo down to size. There are other features which are often overlooked. Here are some of the more useful actions you should know about.
1. Rotational Cropping – (Straighten Photos)
Click the cropping tool, and then move your cursor outside of the image area. You’ll see the pointer change to a bent two-headed arrow – the symbol for rotation. Simply click and drag the cursor around to rotate and crop your photo.


This is very handy for when you want to straighten a wonky horizon in a picture. As you rotate, a grid of squares will appear to help you line up the horizon more accurately.

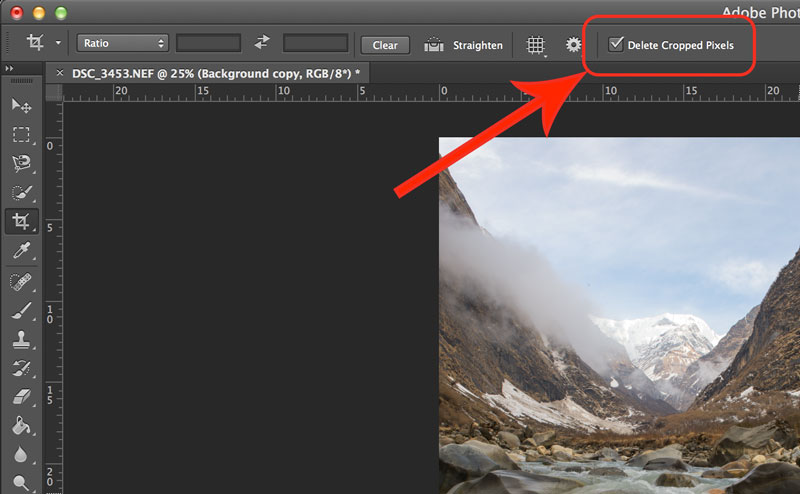
2. Hide or Delete Cropped Area
Have you ever cropped a photo before making further edits, and then realised you don’t want the image to be cropped so much? You have to restart the whole editing process again!
No longer! You can actually choose to “hide” the cropped area of the photo instead of deleting it by default. This means you can just pull the cropping tool larger again to bring back the desired parts.
3. Crop to Original Photo Ratio
There’s a quick way to ensure that your crop’s dimensions are at the same ratio to the original photo. Simply hold down the “shift” key whilst you are dragging the cropping handles and the ratio will stay consistent!
4. Perspective Cropping
If the perspective in your image is distorted, you can fix it by using perspective cropping. Firstly, right-click on the crop tool in the toolbar and choose “Perspective Crop Tool”.
Then, select an area of the image you would like to crop to (just like you would normally). Then, pull the handles at the corners of the image as desired. Finally, double-click and your image will be distorted to fit a rectangle. Done correctly, this will fix problems with perspective.

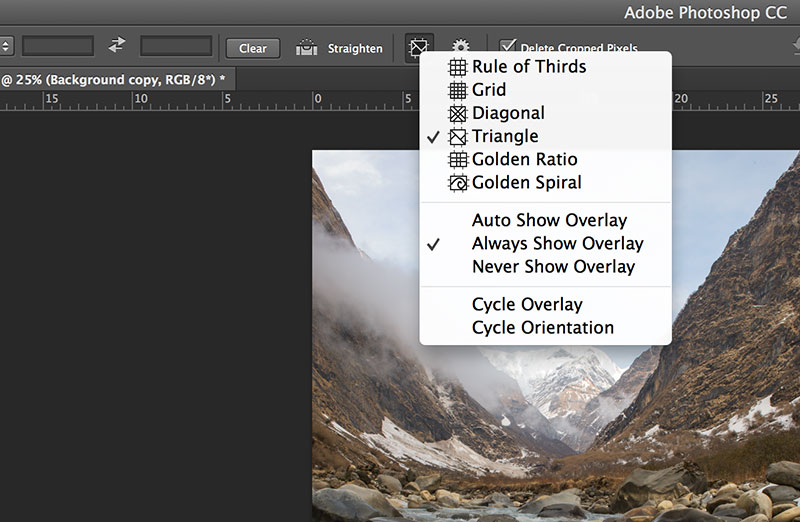
5. Compositional Aids
With the cropping tool selected, look at the top toolbar. Click the drop down menu for overlay options. It’ll be under a symbol similar to the one in this screenshot.
There are a variety of different compositional overlays Photoshop provides you with while cropping. By default, you see a grid to aid with the rule of thirds. However, you can change this to help with anything from triangular composition to the golden spiral.
6. Crop Presets
To ensure that you crop to the same size with all your photos, you can apply crop presets. There is a selection of presets already within Photoshop, but you are also able to create your own to fit any needs. This is handy if you are cropping multiple images all to the same dimensions.
Simply click the drop down menu in the top toolbar next to the crop symbol, and you can choose from a variety of options.


